In this guide, you’ll learn how to configure records to improve your domain health and deliverability.
Why are DNS records important for sending emails?
When you send campaigns from a business mailbox, your email address is always associated with your domain name. For example, the email address “john@company.com” is linked to the “company.com” domain. The settings of your sender domain and its DNS records directly impact your email account’s performance and play crucial role in email authentication.
Go to setup:

DNS records benefits: Email providers see your emails as authorized = less chance to trigger spam filters = higher chance to reach recipients’ inboxes
1) DNS records improve your domain health and help earn a high sender reputation faster.
2) Emails sent from a healthy domain have a lower chance of any delivery errors.
3) Starting your outreach with a properly configured domain ensures better deliverability than using one without DNS records.
Check your DNS records
A healthy domain ensures the optimal performance of your email accounts. If any record is missing or set up incorrectly, it affects your sender reputation and deliverability. In your Snov.io account, there are two places where you can check your domain records:

How Snov.io helps you with DNS records setup:
• You can check your domain based on all DNS records
• Identify configuration issues and get instructions on how to update your domain
• Get a domain health score that indicates its technical setup readiness
Check domain health: In the email account settings
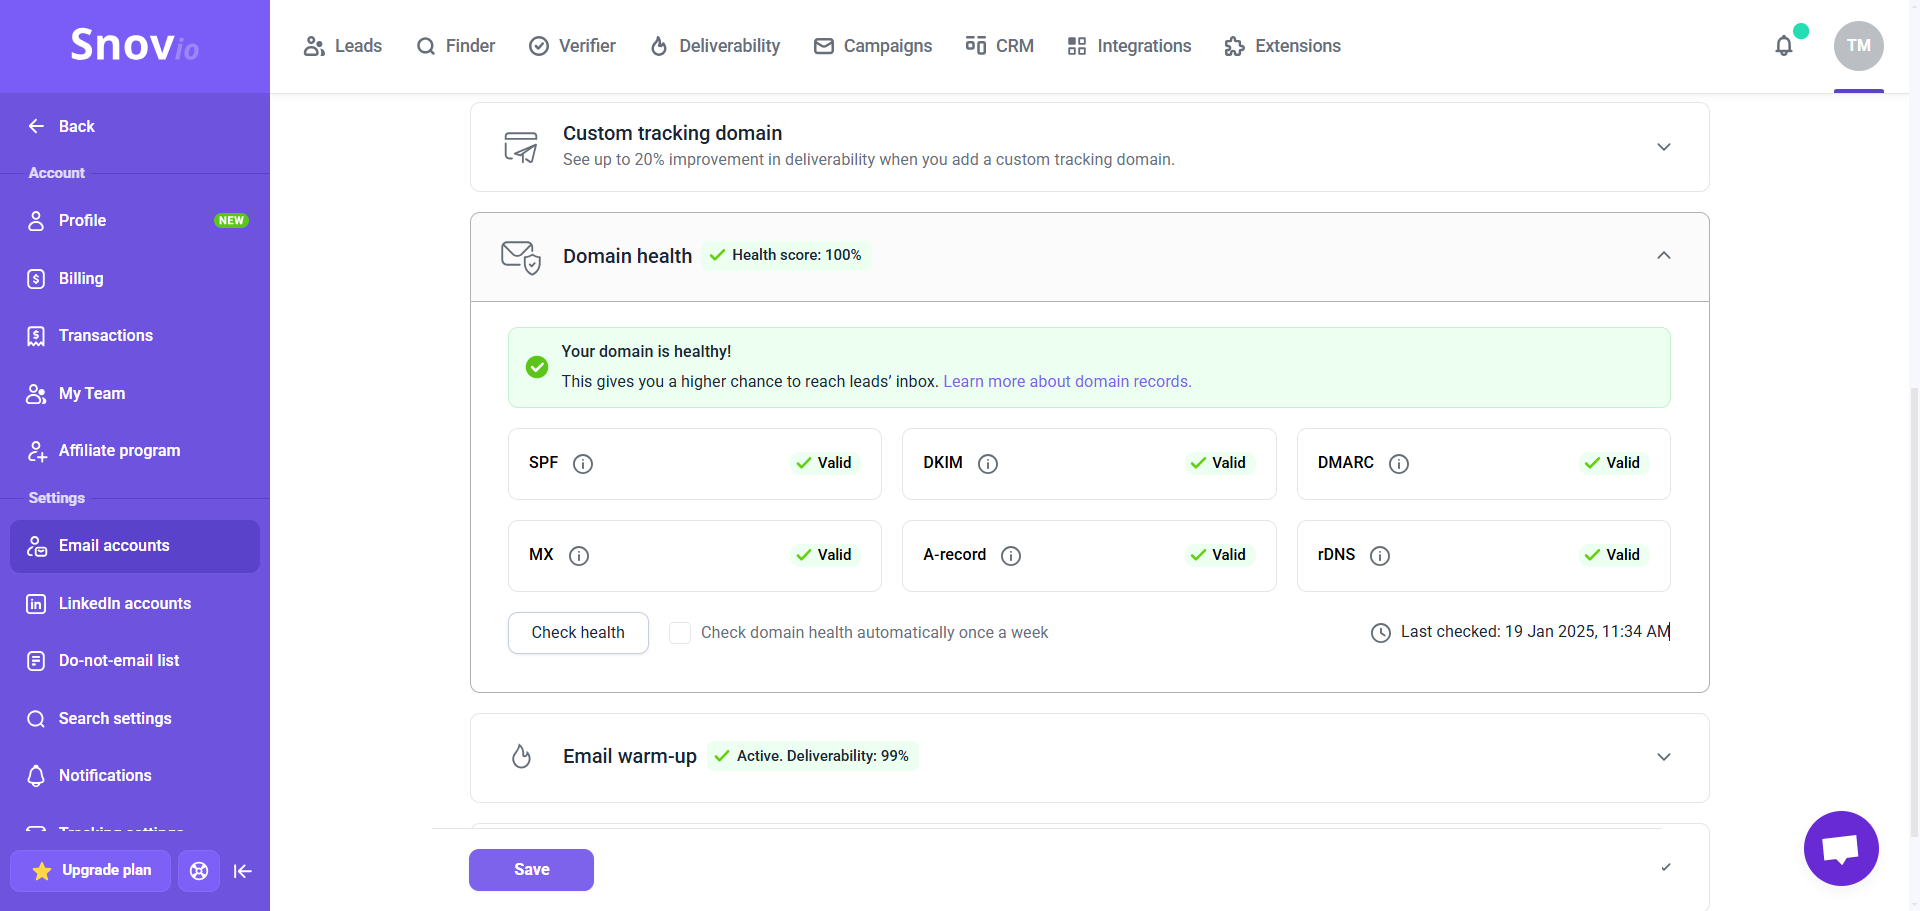
After adding your mailbox to Snov.io, you can check your domain health in the email account settings.
Go to your email accounts list. Click Edit next to the desired account. Scroll down to the Optional settings section and open the Domain health tab.
Once the check is complete, you’ll see the status of each domain record along with an overall health score. If any record is missing or has issues, the results will indicate which records need updating.
Make sure to check your domain regularly to keep it well-configured. You can also enable automatic checks to run once a week.
Check domain health: In the Deliverability test
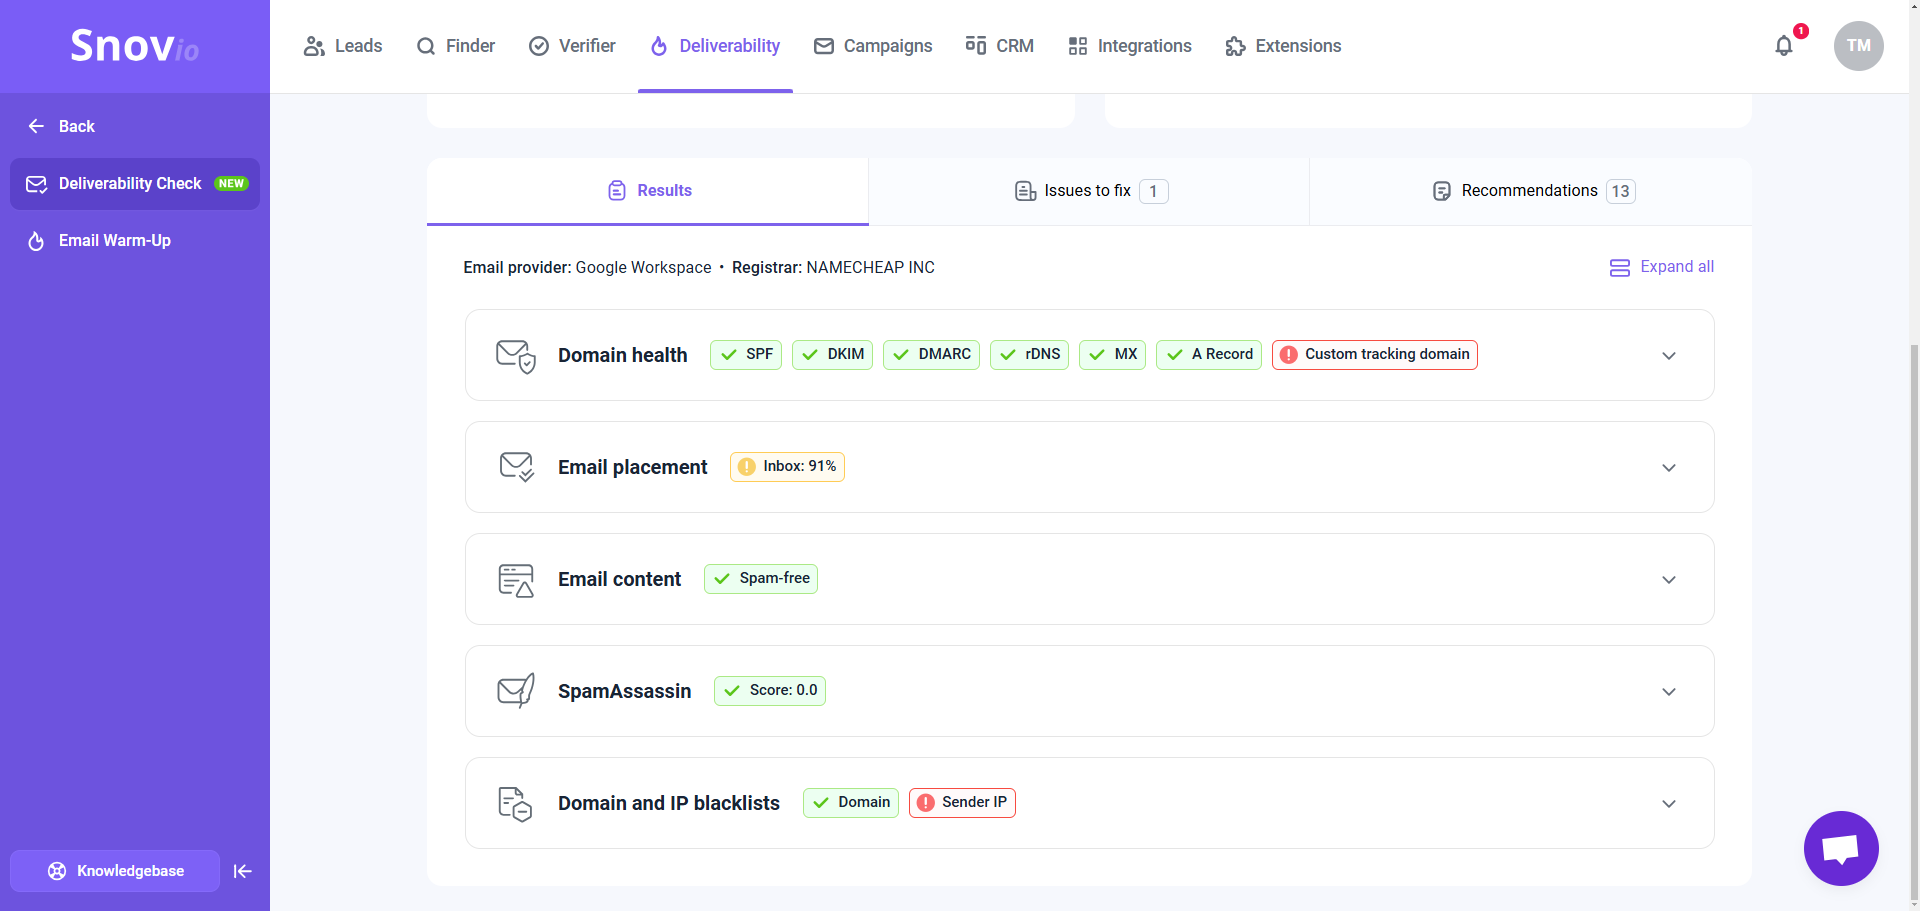
You can check DNS records as part of a deliverability test in your Snov.io account.
In the domain health report, you’ll see the check results and the status of every DNS record (whether it is valid and configured correctly).
You’ll also get personalized instructions on how to update the domain settings for your specific provider (in the Issues to fix tab), along with tips and advice for better deliverability.
Read more about deliverability test results.
Setup DNS records
Before launching your email campaigns, it is strongly recommended to add and verify all necessary DNS records for your sender domains.
Step 1. Identify your domain provider/registrar
First, identify the provider of your domain. This is the service or platform where you registered and purchased your domain name.
Popular domain providers are Namecheap, Amazon Web Services, GoDaddy, Squarespace, IONOS, , etc.
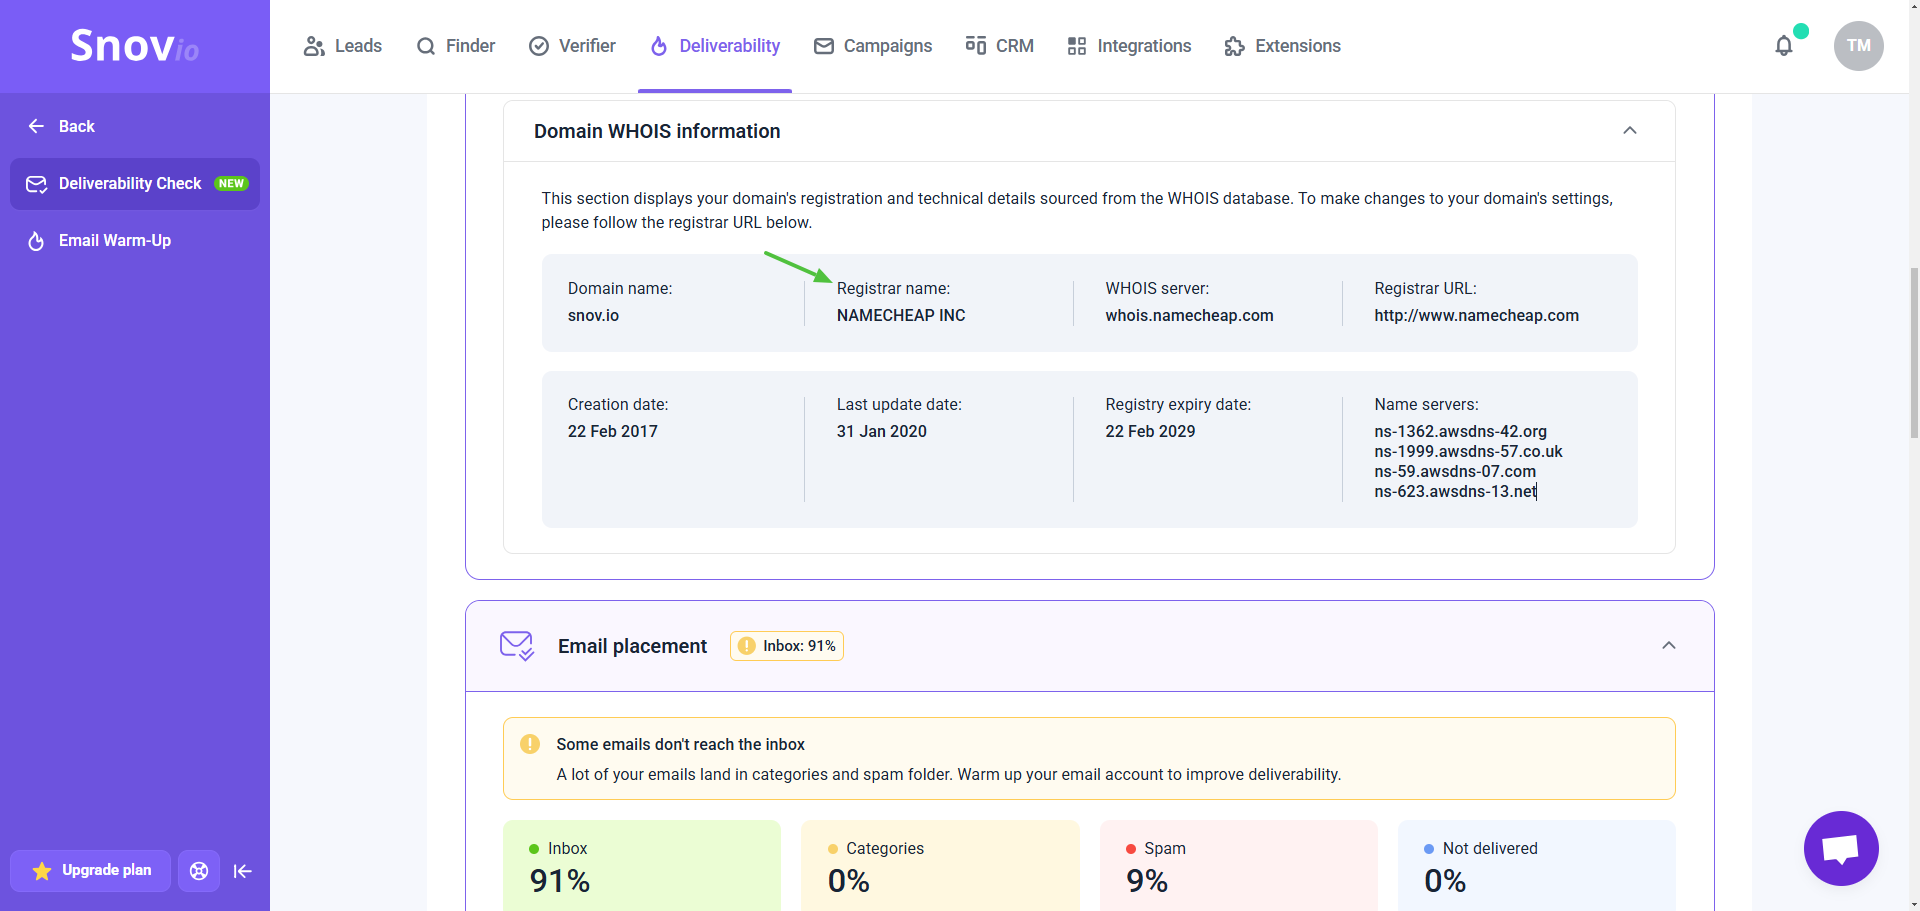
If you’re unsure who your provider is, Snov.io can automatically retrieve information about your domain and email provider during a deliverability test.
In the test results, open the Domain health tab and locate the Domain WHOIS information section. Here, you’ll find details about your domain, including the Registrar URL (your provider’s website).
Step 2. Log in into your domain account
Go to the provider’s website (Registrar URL) and sign in to your account.
Step 3. Access your domain’s DNS settings
To make changes to your domain’s settings, look for the DNS settings section. This is where DNS records are set up.
Step 4. Configure DNS records
Each DNS record is a separate entry in the DNS. Find the option to add a new record.
Setup SPF
SPF record protects your domain and the emails you send from fraud and spoofing (impersonation). Without SPF, your emails may be blocked or marked as spam by providers.
The default SPF record follows this format:
v=spf1 include:example.com ~all
- The part after
include:specifies the email server address of your email provider.
For example, if your email provider is Google, the record will look like this:
v=spf1 include:google.com ~all
Enter the following parameters for the SPF record:
- Record type: TXT
- Host: @
- Value:
v=spf1 include:example.com ~all
(Replace “example.com” with your email provider’s server address, such as google.com for Google Workspace.)
Save the new record. After saving, wait up to 48 hours for the changes to propagate across DNS servers.
Once the update is complete, check your domain health in the email account settings to ensure the SPF record is valid.
Setup DKIM
Setup DMARC
Setup MX
What’s next:
Completing your domain setup is an essential first step in preparing your sender accounts for outreach.
To further improve results and build your sender reputation, add your email account to automatic email warm-up.